How to Invite Members and Manage Roles in Your Room
A Room is only as useful as the people in it. You can build the nicest layout in the world, but until your members are inside, it's a page nobody reads.
This guide covers the part that comes after building: getting people in, keeping track of who hasn't joined yet, and deciding who can help you run the Room. If you haven't built your Room yet, start with How to Build a Room for Your Group, Step by Step and come back here.
Before you invite anyone: publish the Room
Invitations only open once the Room is live. While it's still a draft, the Members tab shows a short note instead of the invite box.
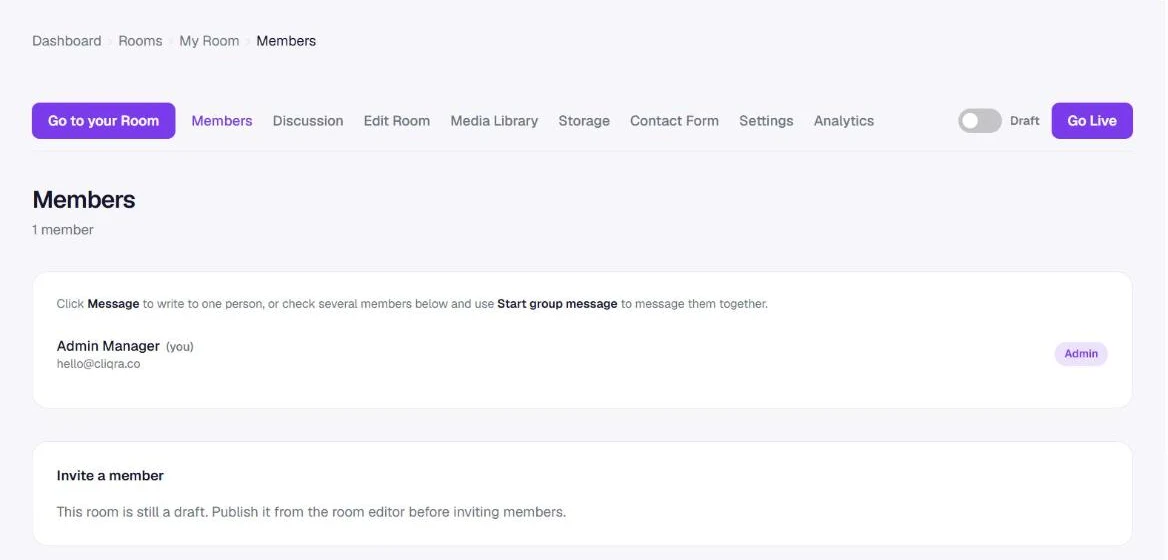
That's deliberate. A draft is your workspace, and you don't want someone clicking an invitation link and landing in a half-finished Room with "Lorem ipsum" in the welcome text. When it looks right, use the Go Live button or switch the toggle from Draft to Active.
One practical tip: before you publish, write a first post in the Discussion. Something like "Hi everyone, from now on the schedule and photos will be here" is enough. People who arrive to an empty Room tend to leave and not come back.
Inviting people by email
Open the Members tab. Under Invite a member there's a single box for email addresses.
You can paste one address or fifty. Separate them with commas, spaces or new lines, whichever is easiest. If you have a list in a spreadsheet, copying the whole email column straight into the box works fine. Click Send invitations and each person gets an email with a link to join.
Your plan decides how many members a Room can hold. If you're close to the limit, it's worth checking before you send a big batch.
Keeping track of who hasn't joined
Everyone you invited appears under Pending invitations until they accept. Next to each one you'll find two actions:
- Resend sends the invitation email again. Useful when someone says they never got it, which usually means it went to spam or to an old address.
- Revoke cancels the invitation, so the link stops working. Use it if you invited the wrong address or someone is no longer part of the group.
A week after a big invite round, look at the pending list. The people still on it are the ones to nudge personally, by phone or in the old group chat.
The three roles
Everyone in a Room has one of three roles. Most people will simply be members, and that's how it should be.
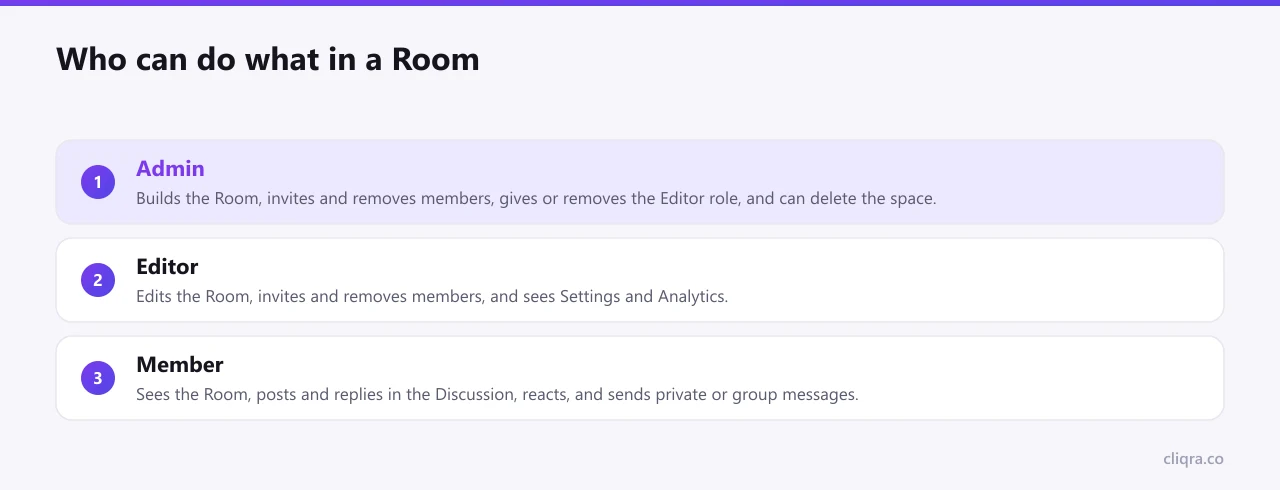
Admin is the person who created the Room. The admin can do everything: build and edit, invite and remove members, give or take away the Editor role, and delete the space.
Editor is the role for the people who help you. An editor can edit the Room, invite and remove members, and see Settings and Analytics. What an editor can't do is change other people's roles. That stays with the admin, so nobody can quietly promote themselves or demote you.
Member is everyone else. Members see the Room, post and reply in the Discussion, react to posts, and send private or group messages. They can't change the layout or the settings.
When to make someone an editor
In the members list, next to each person, there's a Make editor button. It's tempting to give the role to anyone who offers to help. Try not to.
A good rule: one editor for every person who actually does recurring work. In a parents' group, that might be the class rep. In a sports club, the assistant coach who updates the schedule. In a book club, the person who books the café every month. Two or three editors is plenty for most groups. If too many people can edit, sooner or later someone deletes a section by accident, and nobody knows who.
If someone's role changes, the same place has Remove editor. It's not a big deal and nothing is lost; they simply go back to being a member.
Removing a member
People leave groups. Kids change classes, players move teams, a club member moves away. Next to each member there's a Remove button. Removing someone takes away their access to the Room. It doesn't send them a dramatic message, and it doesn't delete what the group has already shared.
If you remove someone by mistake, invite them again. They'll get a fresh invitation and can rejoin.
Messaging members from the same screen
The Members tab isn't only for administration. Click Message next to any person to write to them privately, or tick several people and use Start group message to write to them together. The full story is in Private Messages, Group Messages and Notifications.
A short checklist
- Publish the Room and post a first message before inviting anyone.
- Paste all the addresses at once; commas, spaces and new lines all work.
- Check the pending list after a few days and follow up personally.
- Give the Editor role only to people who do recurring work.
- Remove people who have left, so the member list stays honest.
Once people are in, the place they'll spend most of their time is the Discussion. The next guide explains how posts, replies, reactions and @mentions work.