How to Add a Contact Form and Manage Submissions
A Page that explains who you are is good. A Page where people can actually reach you is better. Whether it's someone asking to join your running club, a parent with a question about registration, or a potential customer, the contact form is often the most important thing on the page.
This guide shows how to add one, how to choose its fields, where the messages go, and how to keep track of them.
Where a contact form makes sense
The Contact Form widget works in both Pages and Rooms, but it shines on a public Page. Visitors don't need an account to fill it in, which makes it the natural bridge between "I found your group online" and "I'm in." If you haven't built a Page yet, How to Build a Landing Page Yourself walks through it.
In a private Room, a form is useful for structured requests from members, like sign-ups for an event or volunteer forms, where you want everyone's answers in the same shape.
Step 1: Add the widget
Open the builder with Edit Room or Edit Page. Either drag Contact Form from the widget list into a column, or click + Add widget in a column and choose it from the popup.
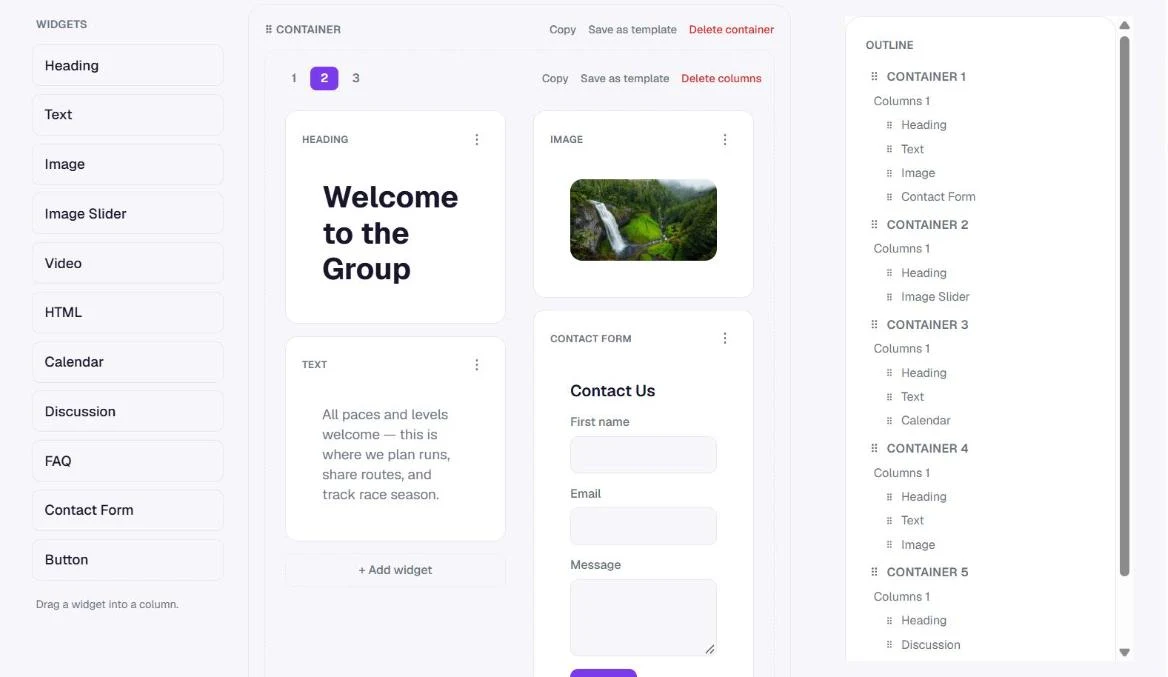
It arrives with three fields already in place, first name, email and message, which covers most needs. On a Page, put it near the bottom with a short heading above it, such as "Want to join? Send us a message."
Step 2: Choose the fields
Click the widget, or use its ⋮ menu and choose Edit, to open its settings.
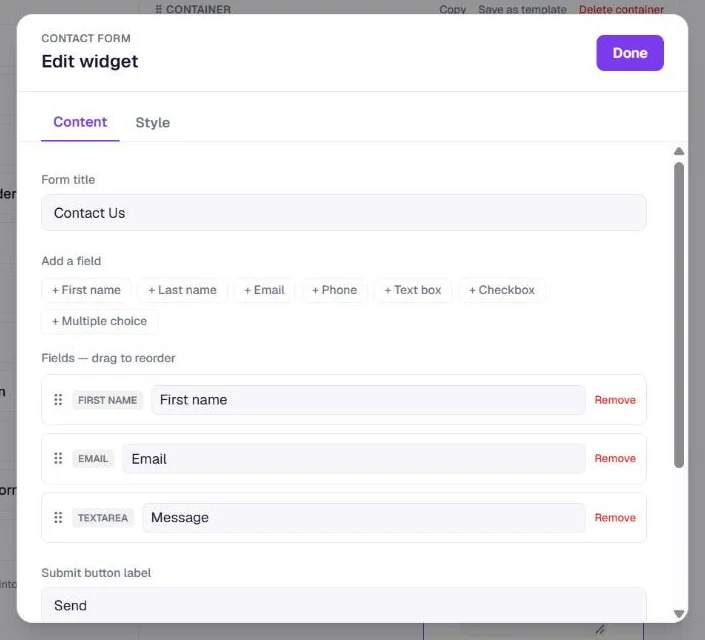
Under Add a field you can add first name, last name, email, phone, a text box, a checkbox or a multiple choice question. Each field's label can be renamed, so "Text box" can become "Which age group is your child in?" Drag the fields by their handle to change the order, and remove anything you don't need.
Keep it short. Every extra field means fewer people finish the form. For a first contact, name, email and one question is usually enough; you can ask for details later, once they've replied.
You can also change the form title and the submit button's label. "Send" is fine, but "Ask to join" or "Request a spot" tells people what happens next.
Step 3: Decide who gets the emails
By default, every submission is emailed to the space's admin the moment it arrives. If someone else handles enquiries, like a club secretary or a shared inbox, enter their address in the form's Send submissions to field.
The email contains everything the person filled in. To answer, simply reply from your own email. There's no separate reply system to learn.
What happens when someone sends it
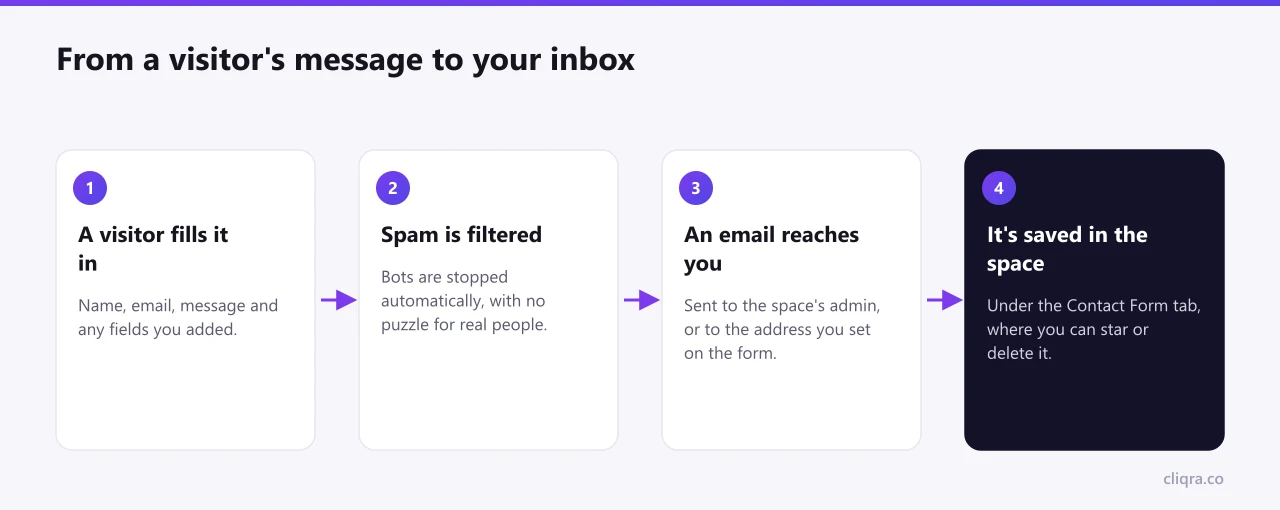
Spam protection is built in. Bots are filtered out automatically, and real visitors don't have to solve a puzzle or tick a box to prove they're human.
Step 4: Review submissions in the Contact Form tab
Emails are convenient, but they get buried. Every submission is also saved under the Contact Form tab of the space, newest first.
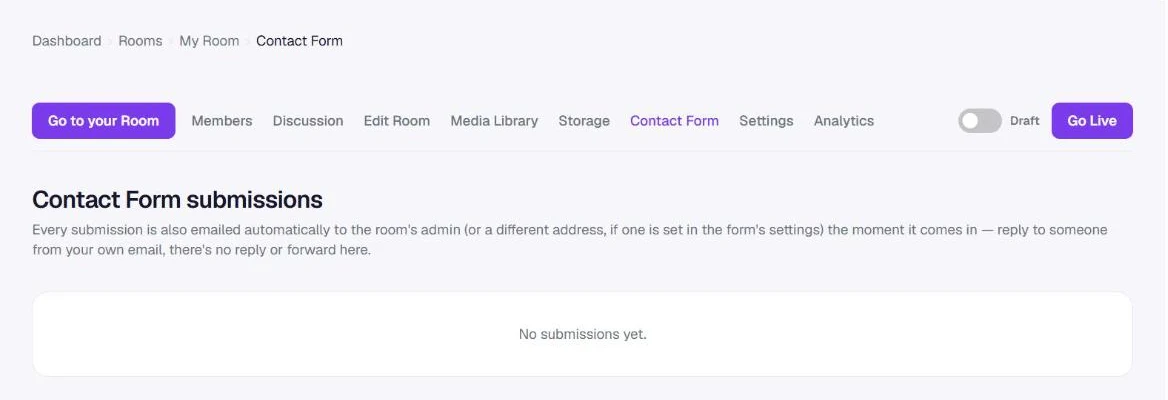
Each entry shows the answers with the field labels as they were when it was sent, so changing the form later doesn't scramble older submissions. Two actions help you stay on top of things:
- Star the ones that need a follow-up, like a new member waiting for an invitation.
- Delete the ones you've dealt with or that aren't relevant.
From enquiry to member
For many groups, the form is the first step of a longer path: someone finds your Page, sends a message, and you invite them into your private Room. That's exactly how the community in From a Public Page to a Private Community grew. Once they've written, inviting them takes a minute; see How to Invite Members and Manage Roles.
A last tip: check the Contact Form tab once a week even if you get the emails. It takes a minute, and it's the easiest way to notice the message you meant to answer and didn't.